Mercedes-Benz BRABUS WIDESTAR G63 AMG W464 Build
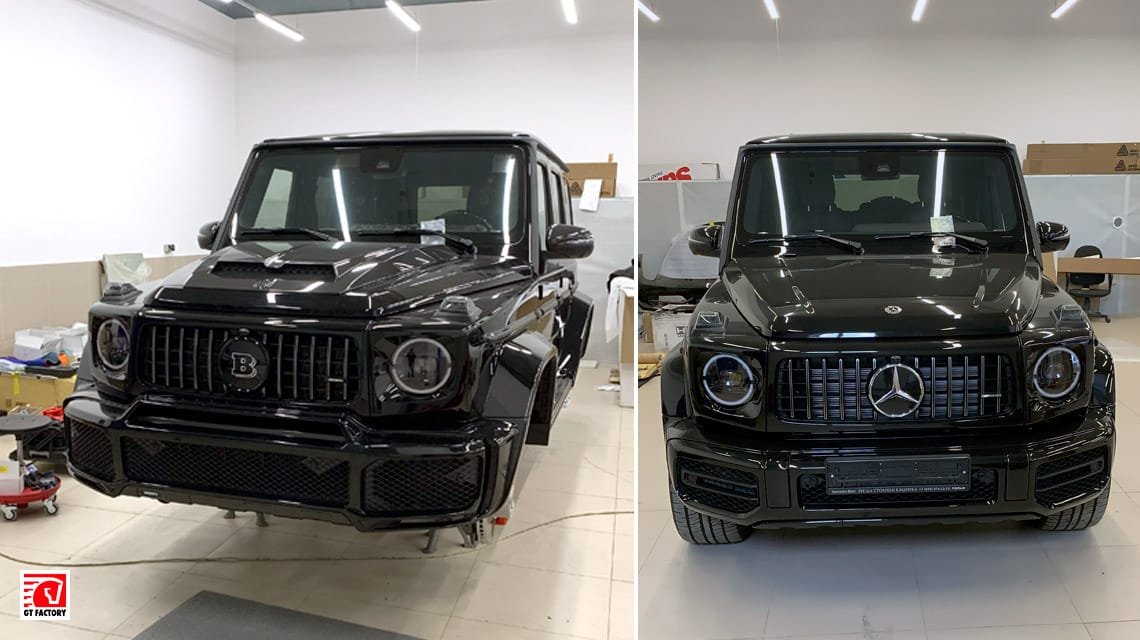
Photo by GT Factory
About the BRABUS WIDESTAR G63 AMG Project
This project was a full BRABUS WIDESTAR G63 AMG W464 build. The conversion included exterior components, exhaust work, interior upgrades, lighting elements, carbon fiber details, brake caliper refinishing, and supporting BRABUS components.
GT Factory began working with BRABUS products in 2008. Since then, we have supplied, installed, and built a number of vehicles around the brand’s programs. A BRABUS G-Class project requires more than simply attaching parts. It requires careful disassembly, correct wiring, clean assembly, and attention to the visual balance of every detail.
BRABUS Exhaust Installation
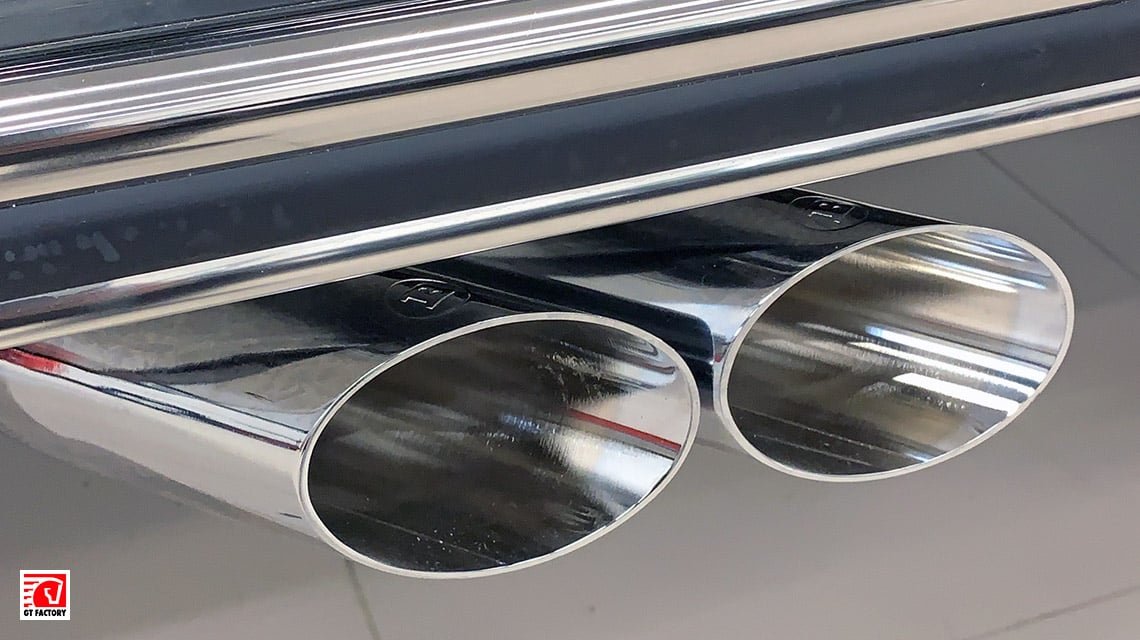
Photo by GT Factory
The first step was the installation of the original BRABUS exhaust system with polished stainless steel tailpipes. On a G-Class build, the exhaust is not only a performance and sound upgrade. It also changes the presence of the vehicle and sets the tone for the rest of the project.
Disassembly and Preparation
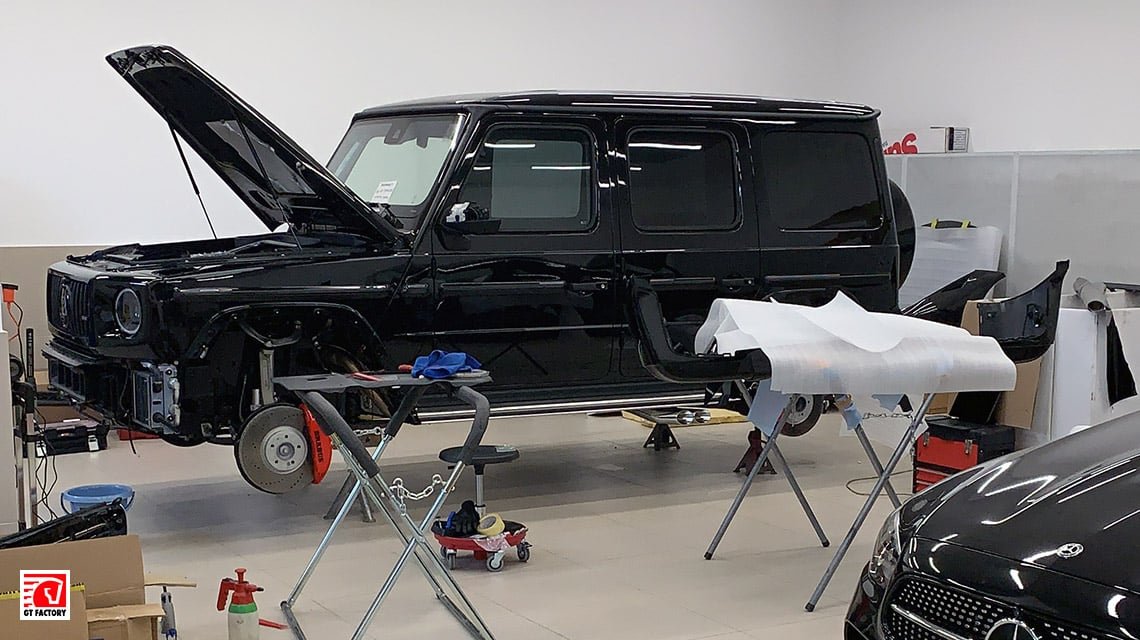
Photo by GT Factory
After that, the exterior components were removed. This included the bumpers, spare wheel cover, fender flares, wheel arch liners, mirror covers, and brake calipers. The interior was also fully disassembled and sent to the upholstery team at RS-LINE for leather work.
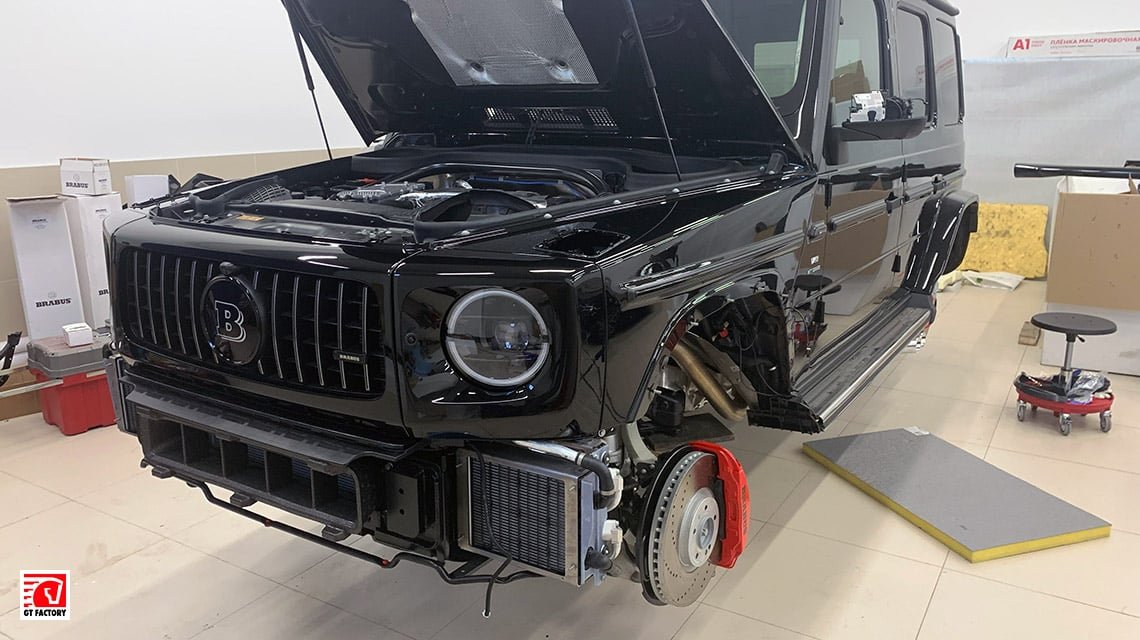
Photo by GT Factory
The installation of the BRABUS kit started with wiring. The required harnesses were routed, and the control modules were connected to the vehicle’s electrical system. This stage matters because illuminated components and control logic must work properly after final assembly.
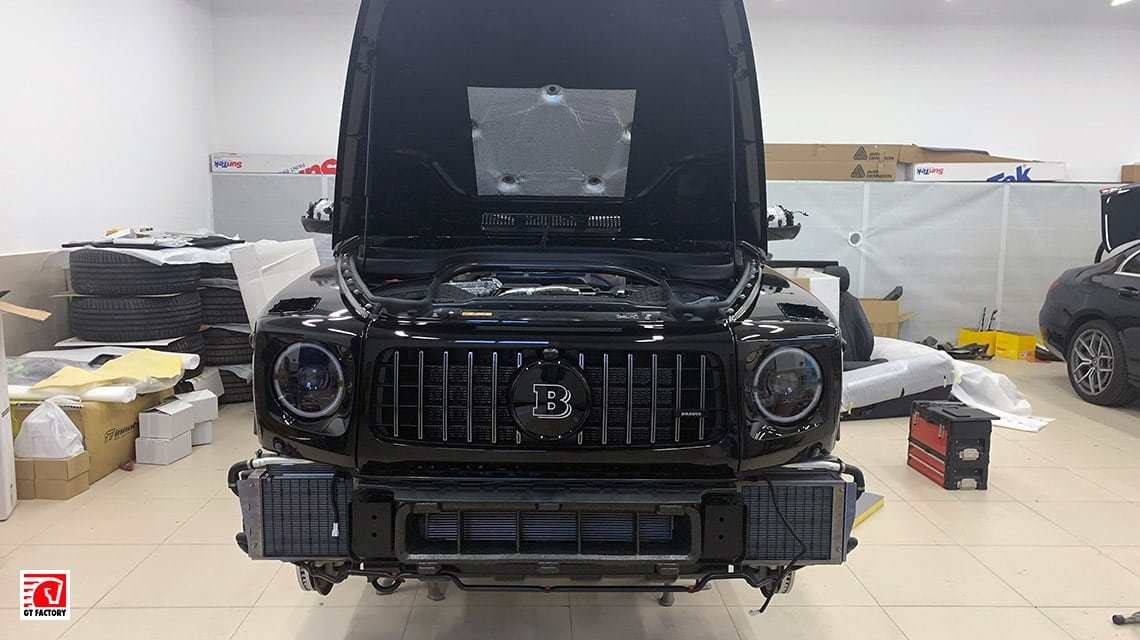
Photo by GT Factory
Next, the double-B emblem and illuminated BRABUS grille logo were installed. These details may look simple from the outside, but they require careful integration to keep the result clean and factory-like.
Brake Calipers and BRABUS Details
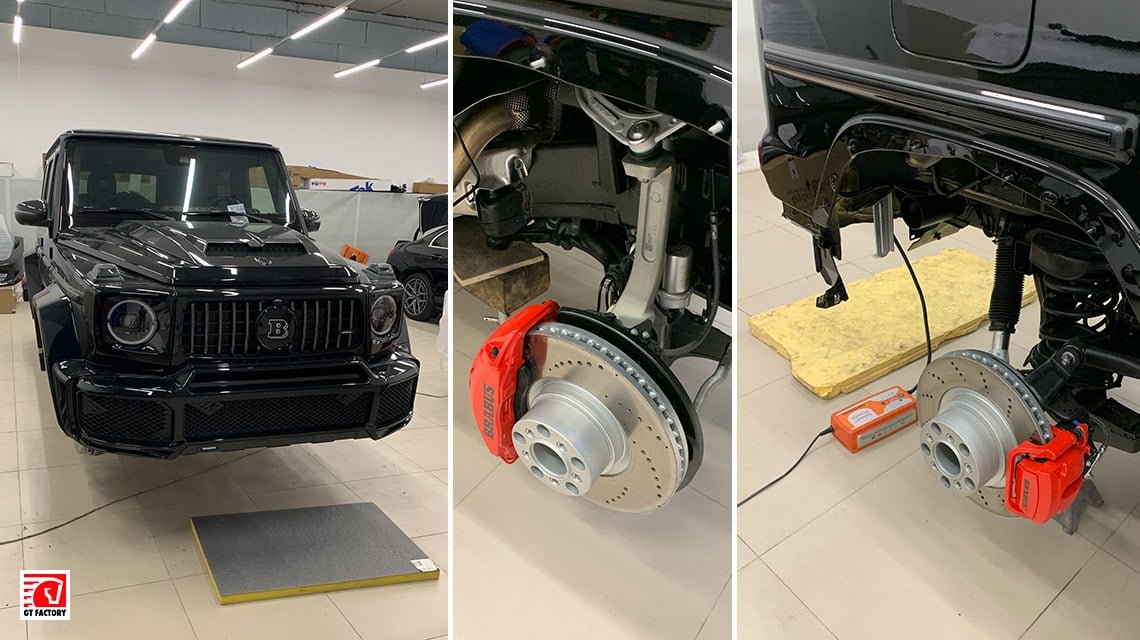
Photo by GT Factory
The brake calipers were refinished in the signature BRABUS red color. After painting, they were sent for BRABUS logo application using polymer printing in accordance with the visual standard required for this type of project.
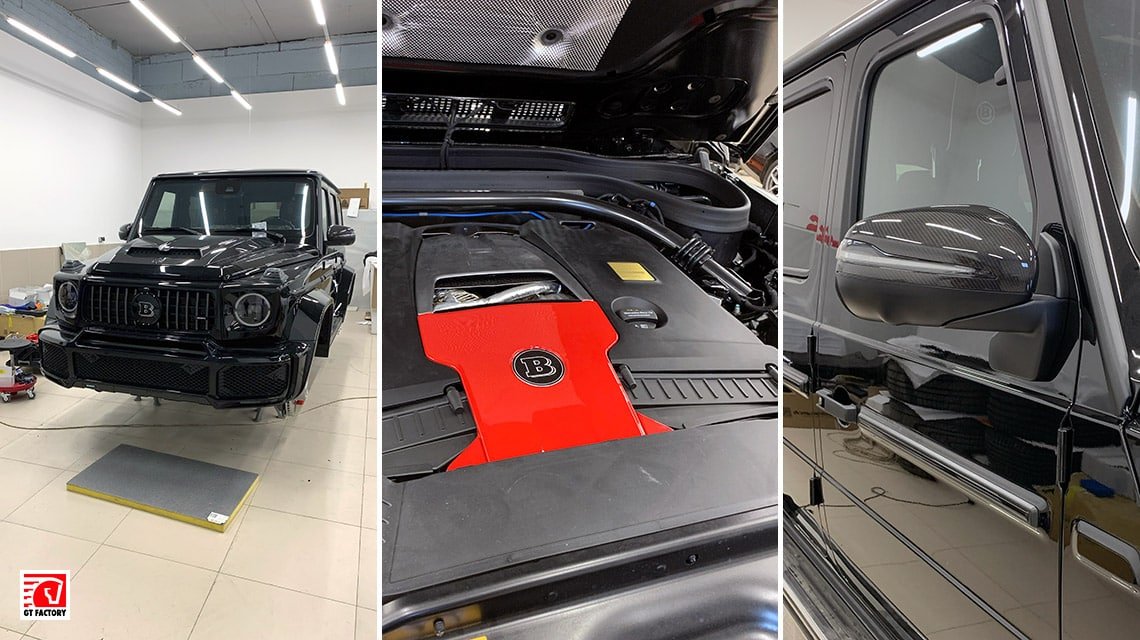
Photo by GT Factory
The BRABUS carbon fiber mirror covers were installed, and the engine cover was prepared according to the B700 performance program applied to the vehicle. At this level, even small visual elements must support the overall specification of the build.
Interior and Exterior Assembly
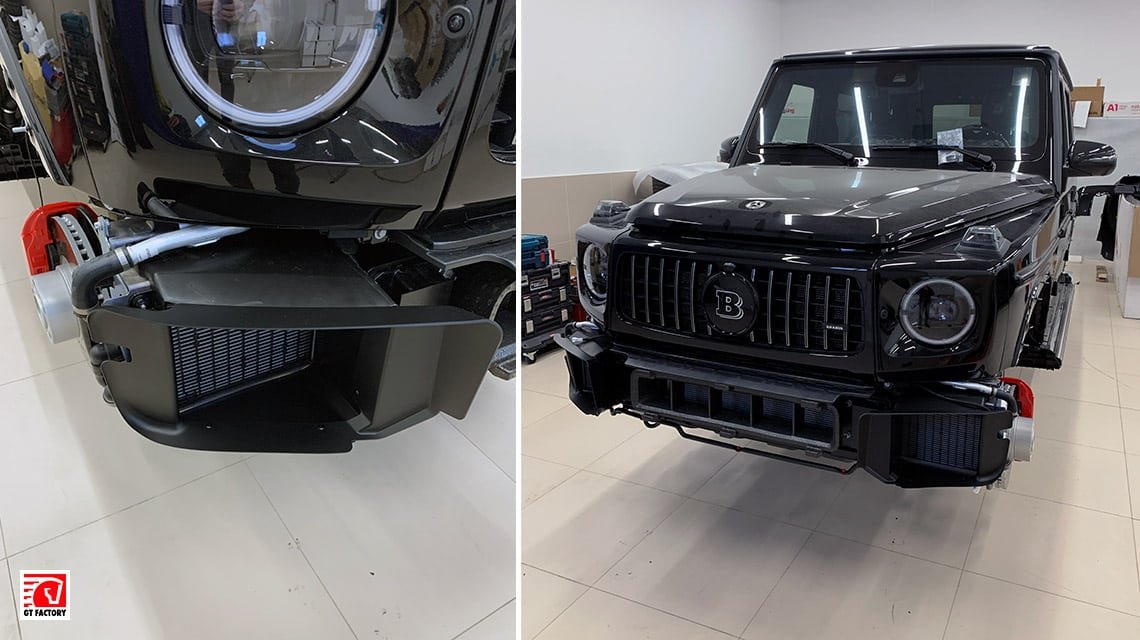
Photo by GT Factory
While the upholstery team worked on the interior and the exterior BRABUS WIDESTAR components were being painted, the vehicle was prepared for final installation. This stage is about sequencing, fitment checks, and making sure the car is ready before painted parts return for assembly.
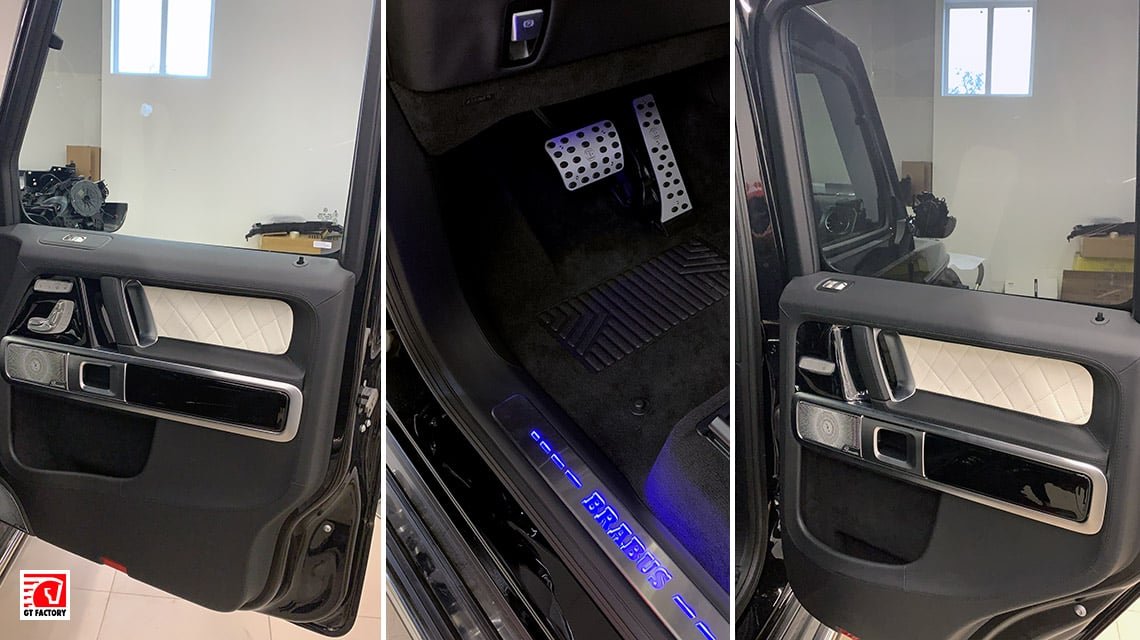
Photo by GT Factory
The illuminated running boards, rear door panel, steering wheel paddle shifters, and pedal covers were installed. After the Nappa leather interior was assembled, the BRABUS door lock pins were added as finishing details.
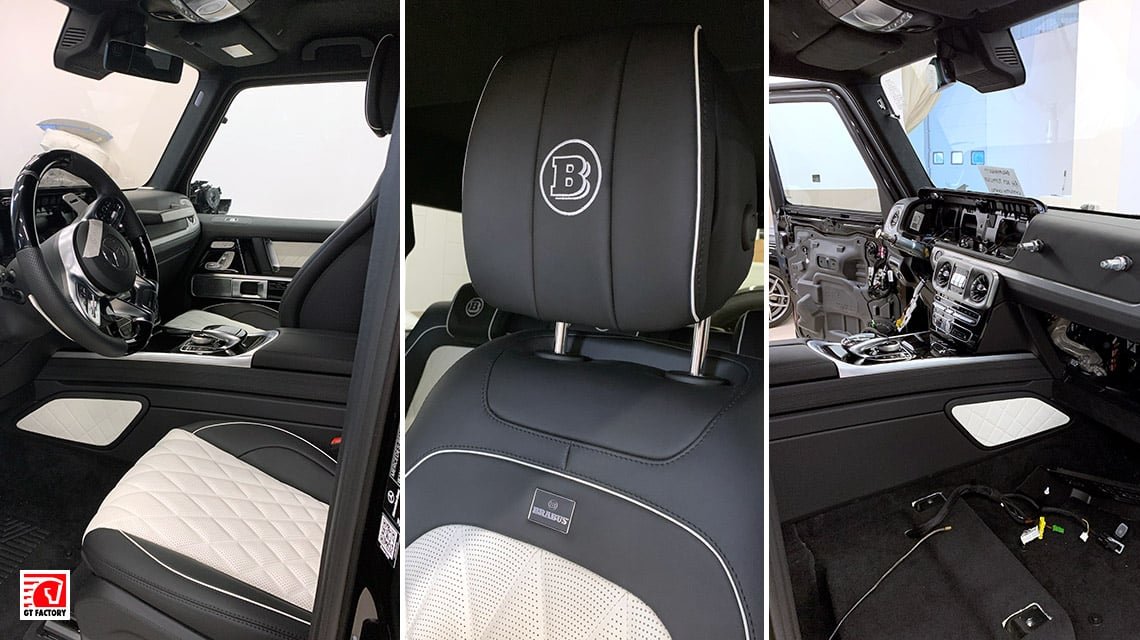
Photo by GT Factory
The interior was completed according to the BRABUS visual language. In addition, the instrument cluster panel was sent to Germany for software work, so the interior and electronic presentation matched the level of the conversion.
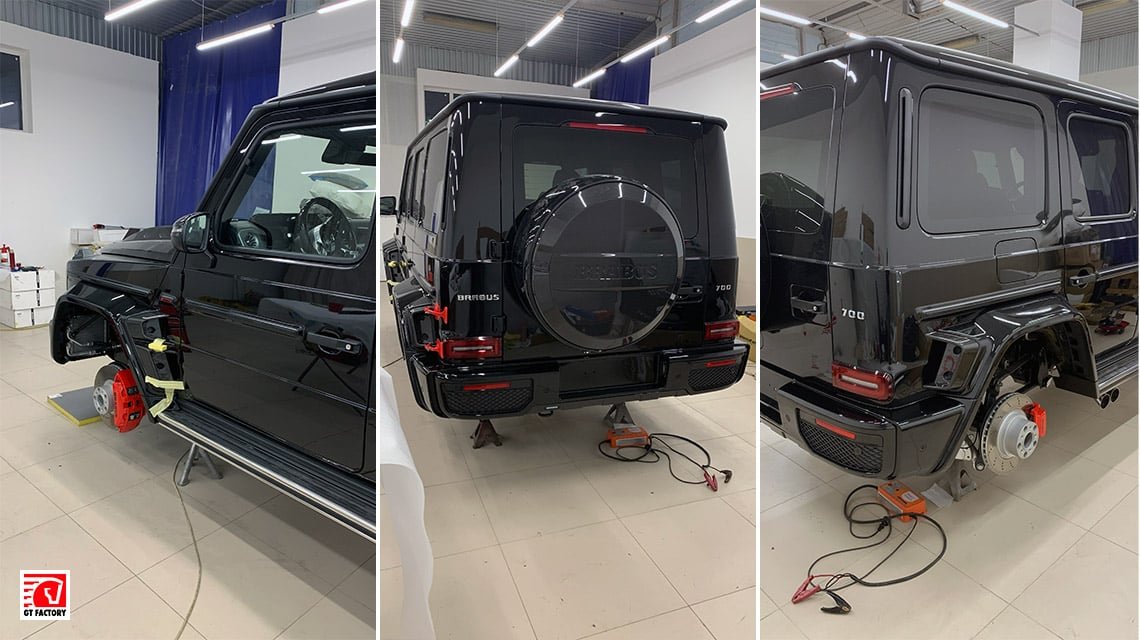
Photo by GT Factory
Final Assembly
The final stage included assembly of the bumpers, fender extensions, and exterior components. Once all painted parts were ready, they were installed on the vehicle with attention to alignment, gaps, and the overall stance of the WIDESTAR conversion.
Unfortunately, there was no time to complete a proper final photo session of the finished vehicle. Still, the build process shows the scope of work behind a serious BRABUS G-Class conversion.
GT Factory has long-term experience with BRABUS components, G-Class conversions, and complex premium vehicle builds. For questions about BRABUS components, installation, or vehicle-specific project planning, please contact our sales department.